Installing the Warp 9 320mm caliper adapter bracket can be a confusing project. While the Big Rotor itself is a simple swap, the mounting relocation bracket can be confusing, so we wrote this quick installation guide to help.
Tools Required
- 10mm socket
- Ratchet
- 12mm box end wrench
- 6mm Allen Wrench
- Flat blade Screwdriver

Unbolt the stock caliper assembly from the fork leg with a 10mm socket. There is no need to undo the brake line.

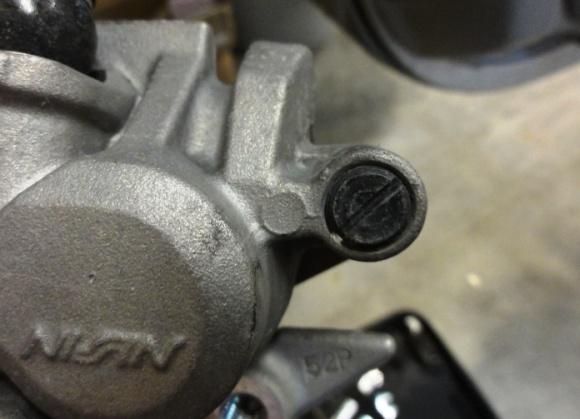
Once the caliper is free from the fork leg, you need to remove the brake pads. Start by removing the brake pin cover screw (shown in image) with flat blade screwdriver and then the brake pin (the brake pin holds the pads in the caliper). Once you remove the cover screw, you will see a 6mm Allen head bolt, remove that. The brake pads should now be easy to remove.

Next you will have to remove the mounting bracket portion because this is what we are going to replace. See the image below to help understand what piece you will be removing. With the pads removed it will slid apart on 2 floating pins

For optimum performance, we suggest you replace your brake pads at this time as well. New pads will help you achieve the performance gain you are looking for with the oversize rotor. Old pads that are worn to fit the existing rotor shape will not conform to the flatness of the new rotor and can hinder braking power.
Inspect the brake pin as well and be sure that there are no grooves or significant wear on this pin.
The Caliper floats on these two pins, one attached to the caliper and one attached to the mounting bracket.
Remove the spring clip and Pin from the stock bracket. These will go on the fancy new Warp 9 bracket that came with your new rotor/wheels. See the image below for details.

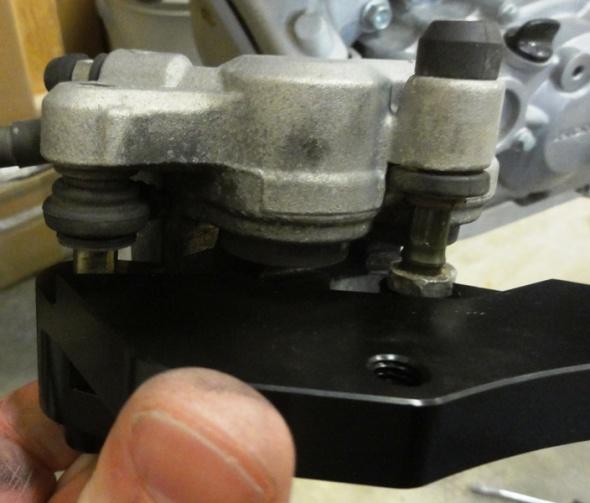
Install the spring clip and pin on your new mounting bracket as shown in the image below.

Lubricate both pins (the one on your new bracket and the one still attached to the caliper) with grease. We recommend a white lithium based grease.
Place the new mounting bracket on the caliper assembly as shown.

Reinstall the brake pad pin and cover cap into caliper.
This is what it should look like with the new Supermoto bracket on your existing caliper.
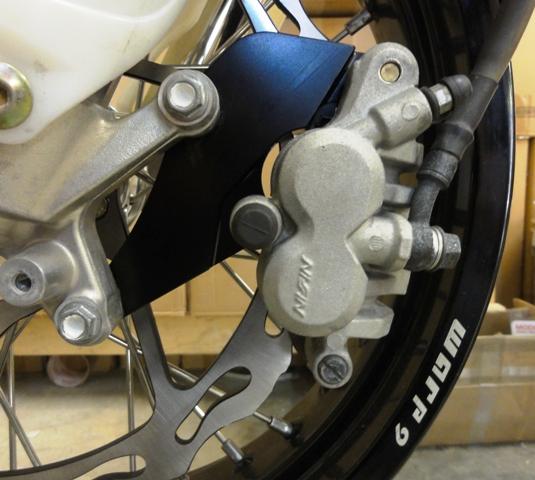
Mount the caliper back up to the fork tube using the stock bolts you removed with a drop of blue Loctite© threads.
Be sure and pump the brake lever a few times to be sure it is working properly and then take it for a test ride! Go easy until you get a feel for just how strong your new brakes are. If it is not up to your expectations, remember that it will take awhile to break-in and should improve within a few rides.
If you have any questions, please feel free to give us a call at 801-699-7979.